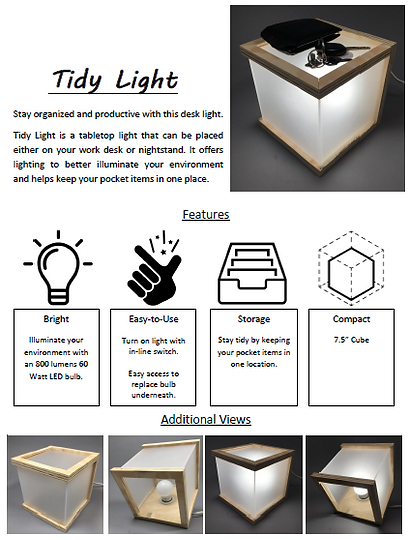
TIDY LIGHT
Stay organized and productive with this tabletop lamp.
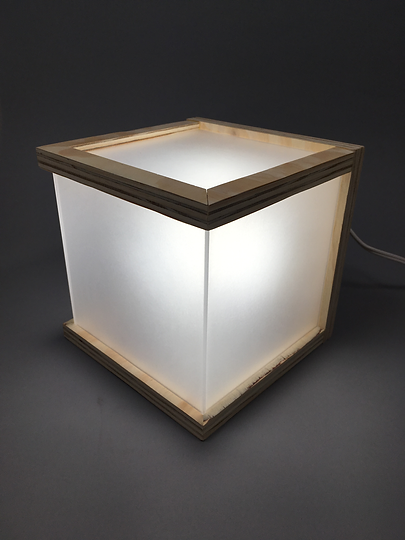
Tidy Light is a tabletop lamp that can be placed either on your work desk or nightstand. It offers lighting to better illuminate your environment and helps keep your pocket items in one place.

PRODUCT FLYER
TARGET CUSTOMER
This product is for those who work in a poorly lit environment and suffer from eye strain or are unable to do work effectively. This could be for a student or office employee with inadequate living conditions or office environments. What's more, it is designed to help de-clutter desk space. The user can place small items atop of the device.

INSPIRATION
Inspiration comes from YouTubers DIY Creators and Darbin Orvar. I wanted to design a cubic lighting structure that not only brightens the user's surroundings but also allowed the user to keep their pocket items in one easy-to-find location. I also wanted this to be a woodworking project to further my skills.

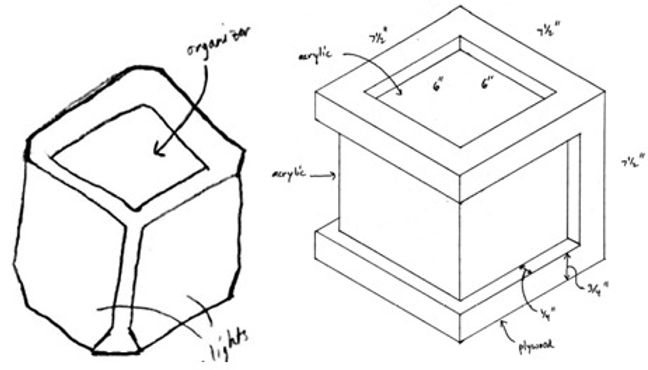
CONCEPT SKETCH
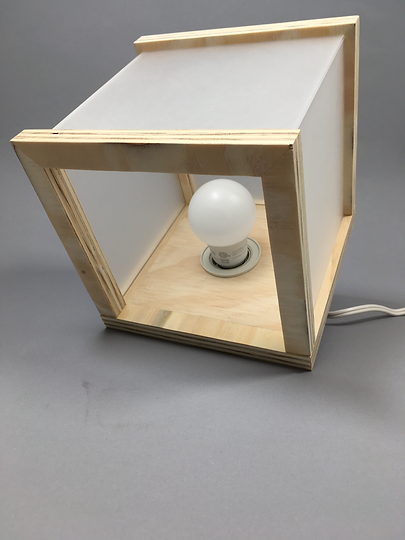
Initial concept is inspired after watching Youtube videos of cube lights. It was later refined with the mindset that I would produce this in a woodworking shop so as to improve my skills. The idea is to have a plywood back wall where the light bulb fixture would mount horizontally. The front and side walls would have acrylic walls. The top would act like a tray to hold any pocket items such as a wallet, keys, phone or watch. The tray would also be acrylic so as to allow light to pass through and give the items a glow effect. There is an opening at the bottom to access the bulb.
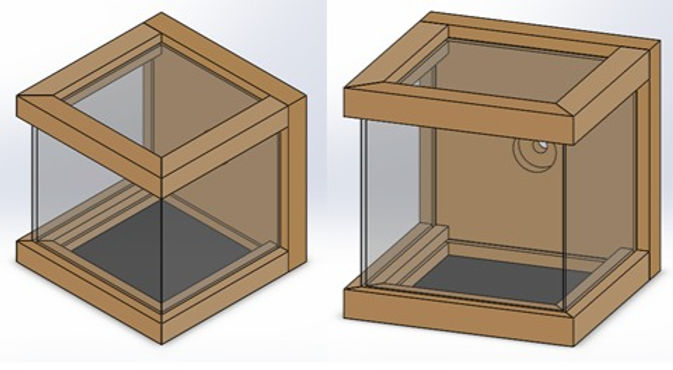
CONCEPT CAD
I then modeled the concept in SolidWorks. While modeling, I thought about the different ways on how to produce each part and how they would come together. I considered the techniques I learned from class as well as advanced methods that I wanted to learn, which includes performing a dado cut, miter cut, and using forstner bits.
FABRICATION PROCESS
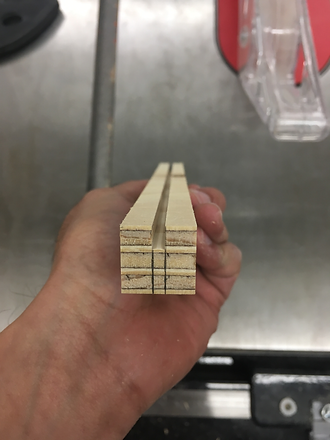
First, I marked the 3/4" thick plywood with locations for my grooves. The blade on the table saw is 1/8" thick which matches the thickness of the acrylic so I only needed to make a single pass. I also marked the plywood on where they split to make 3/4" wide pieces.


Then, I removed the guard on the table saw to setup for dado cutting. I adjusted the height of the blade using a ruler. I lined up the teeth of the blade to be 1/4" above the table at its peak point. This will be the depth of the groove.
Next, I adjusted the fence by lining up the groove markings to coincide with the thickness of the blade.

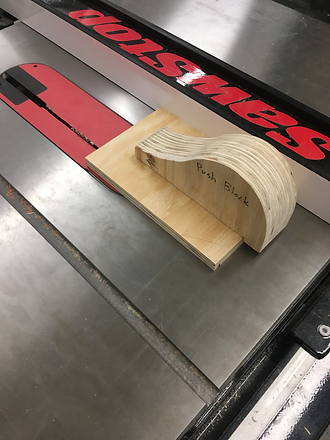
After that, I used a push block to help me feed the plywood into the blade.
This is the result after one pass. I proceeded in this way to make other grooves.


Once I was done making the grooves, I put the guard back on the table saw and adjusted the height of the blade to be above the plywood to perform rib cuts.
And, like before, I adjusted the fence to line up the markings to the blade.

Here is the result.
On the miter saw, I turned the blade in one direction to make a 45 degree cut.

With my fingers off the trigger, I brought the blade down to line up my piece of plywood with predetermined pencil marks. Once I was confident, I held the plywood securely against the rails, reset the blade and brought it down with my fingers on the trigger.

Here is the result. To cut the other end, I proceeded in the same way. Only difference is turning the blade 45 degrees in the other direction. Some pieces needed a straight cut, in which case I reset the blade to zero degrees.

This is the result.

Once all the miter pieces were made, I used the table saw to make 6" x 6" squares. Two of the three that I made were used as supports for when it was time to glue the pieces together. See the first and second image. The third square is glued together with the 3/4" pieces. See the third image.


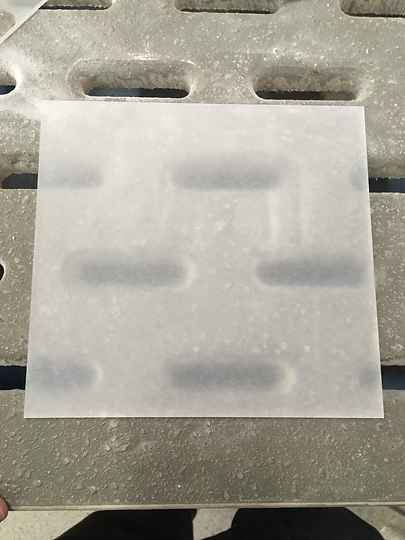
Using the table saw, I cut a sheet of acrylic into four 6 1/2" x 6 1/2" pieces. Then, I went over to the vacuum table to sand them on both sides with 60 and 240 grit sandpaper to get a frosty effect to allow better light diffusion.


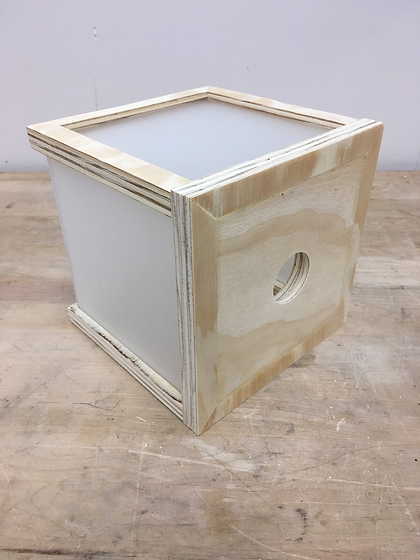
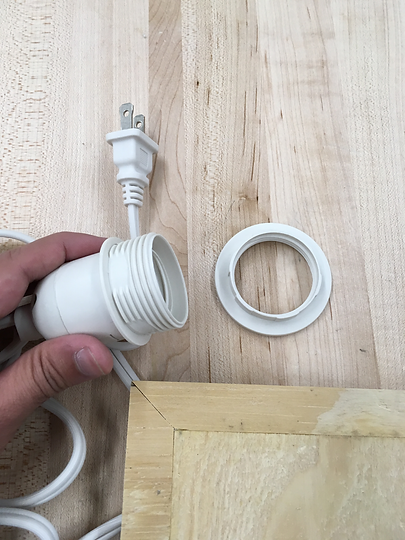
Once the glue dried, I took the back wall and marked the center of it. Using a drill press and 2" forstner bit, I removed 1/2" depth of material, leaving 1/2" as a shoulder. I swapped the 2" bit with a 1 5/8" bit to remove the rest of the material. Note, it is important to proceed in this way so as to have a live center to catch the 1 5/8" bit after the swap.


For a sanity check, I examined if the light fixture would be secured.


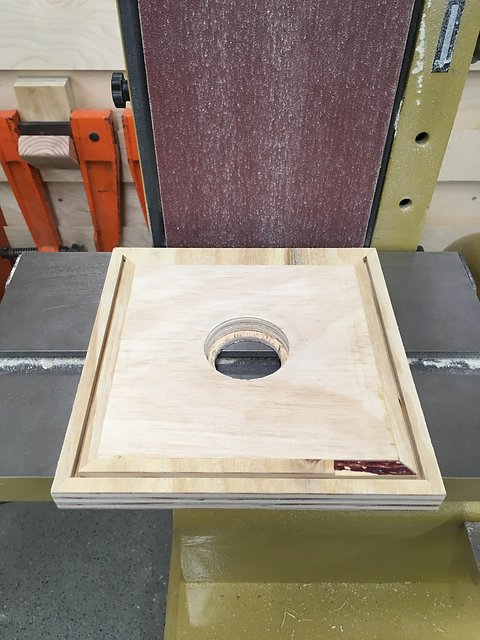
Soon after, I sanded the plywood pieces with a sand belt and a hand sander. I used the 6" x 6" squares again as support to maintain structural integrity as I'm sanding.

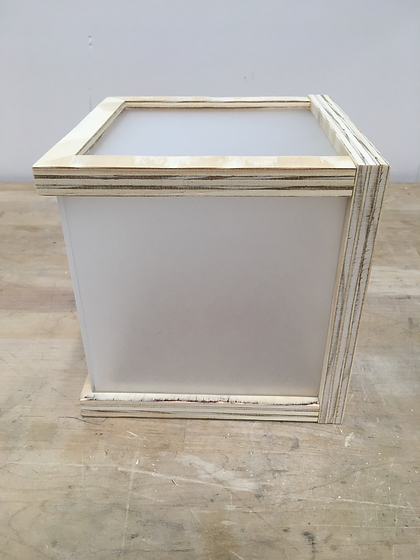
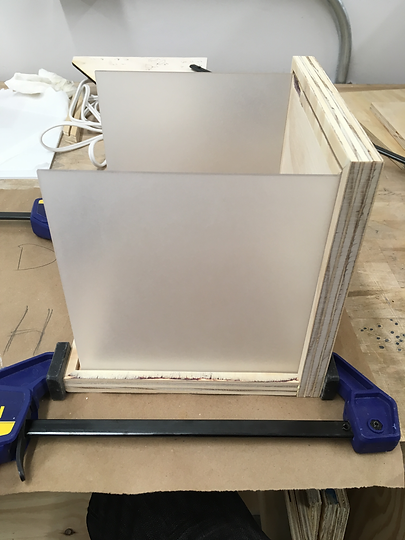
At this point, I am ready to assemble. First, I glued the bottom wall to the back wall and held it in place using clamps. Then, I placed the acrylic inside the grooves. Next, I took the top wall, placed the last acrylic in its grooves, and applied glue on the plywood ends. Afterwards, I lined up the other three acrylic walls into the top walls grooves. Last but not least, I clamped the top wall together to the back wall.


Here are the results.